
Let's Get Growing
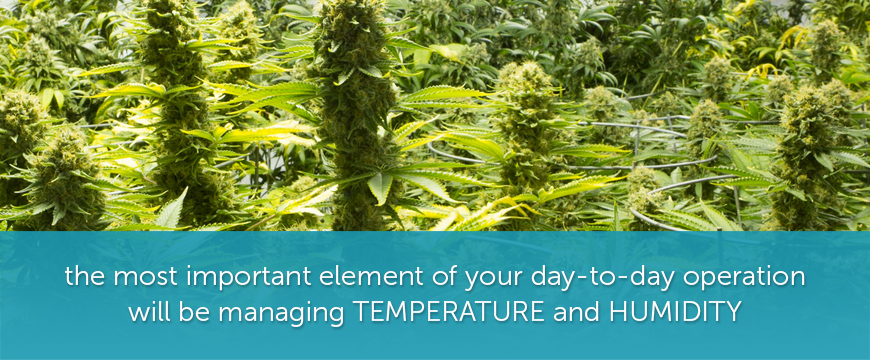
What are the most important points of growing a consistent crop to build your brand? Again, borrowing from the winemaker’s metaphor, it’s all about what you’re growing, where you’re growing it and the conditions it’s grown under. Below, we’ll look at how to create the best growing environment, with a focus on humidity and temperature controls.
To start with, relative humidity is determined by how much water vapor the air can hold at a specific temperature. Warm air can hold more water than cold air, so the warmer the air is, the higher the relative humidity will be.
As you probably already know, after choosing a substrate (the material you’ll be growing your plants in/on), the strain(s) of cannabis you’ll be growing, lights, watering mechanisms
Each stage of a plant’s life-cycle is prone to different needs. With the right equipment, these needs are easily managed when the focus is on keeping everything within the desired ranges and as constant as possible.
To get started, you’ll want to buy a hygrometer and a thermometer. With these tools, you can accurately monitor and then alter humidity and temperature conditions in an attempt to strive for repeatable quality levels time and time again. You will also want to purchase an air filtration system such as a CleanLeaf air purifier. This will allow you to protect your high-value crop from mold, pollen, and bacteria, as well as maintain compliance with clean air regulation and maintain a sanitized grow environment.
The Four Stages of Plant Cycle
1. Seedling Stage
- Seedlings and clones like high humidity levels of 65-70%
- Temperatures with lights
on: off:
The increased humidity levels allow seedlings to take water in through the leaves while their root systems are developing.

2. Vegetation Period
- Humidity levels can be lowered by 5% each week (acceptable range: 40-70%)
- Temperatures may be increased slightly if desired.
- Temperatures with lights
on: 71-82 F° (lightsoff: 8-9 F° lower)
As the roots are now more developed, they’re able to perform most of the needed water uptake with evaporation through the leaves now cooling the plants.
3. Flowering Period
- Humidity levels need to be lowered to 40-50%
- IMPORTANT– Never above 60% humidity!
- Temperatures with lights
on:
4. Late flowering (1-2 weeks before harvest)
While not strictly a necessity, the following can have a direct impact on yield, flavor
- Bring down humidity levels as much as you can: 30-40%
- Lower daytime temperatures, and also increase the temperature difference (day/night)
- Temperatures with lights
on: 64-75 F° (lightsoff: minus 9-18 F°)
Adjusting Humidity Levels and Temperature
Depending on your lighting solution, season a specific crop is grown in (assuming year-round production), the outdoor air vented in (as it will vary in temperature and its own relative humidity), controlling temperature and humidity in your growing space will be one of the tougher challenges you will face on a day-to-day basis.
While it’s tough, just know that every grower working at a scale similar to you is going through this as well.
Ways to Lower Humidity
- Run your existing tube vent on higher velocities or upgrade your air flow fans. This applies to both air exits in tents and the room it is placed in! Increase fresh/cool air supply.
- Try to water your plants right after lights are switched on. The room will be cooler at that time and the immediate absorption will result in less overall humidity.
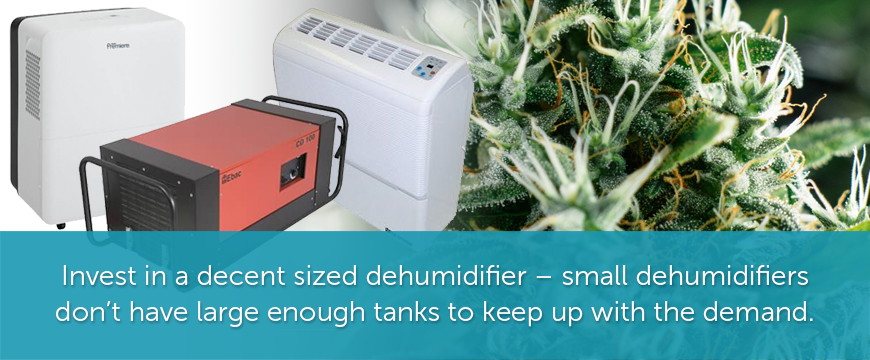
- The most reliable option is to invest in a commercial dehumidifier to reduce humidity levels quickly.
Ways to Lower Temperatures
- Increase the total airflow and air exchange in your growing room
- A simple trick: “lights off” during the day -- “lights on” at night
- When you grow with
High Pressure Sodium lights (HPS), consider using a cool tube - Install an air conditioning unit (AC’s will also lower humidity levels)
Raising Humidity
- You can temporarily increase humidity levels by misting with a spray bottle
- Keep the surface of the soil moist, but not wet
- Hang wet towels/cloths in your grow room or put open water containers in it
- The most consistent option will be: Invest in a humidifier with a large water reservoir (the need for constant refills makes smaller ones inefficient)
Raising Temperatures
- Upgrade to a bigger grow light (more watts = more heat)
- Place a heating mat at the bottom of your tent or grow room
- Use a simple space heater with a reliable thermostat
Protecting Your Investment
Though it may be exciting to see the fruits of your labor as you begin harvesting, the work is far from done. Correctly processing your crop helps prevent any chances of it becoming damaged or rendered non-smokeable. Proper drying and curing are essential to minimizing the risk of mold contamination and it also greatly improves the taste when smoked.
Curation
On top of the need for specific temperature and humidity controls throughout the growing process, it’s worth mentioning that humidity level during the drying process is equally important to the quality of the final product.
Too much humidity in your curing space and you might be left with perfectly grown, but moldy cannabis. Nobody wants that; neither the individual user nor the dispensary buyer. Moldy cannabis is easily the fastest way to ruin your reputation as a reliable grower of high-quality buds.
Again borrowing from Royal Queen Seeds expertise, here’s a how-to on drying your valuable crop:
Wet Trimming versus Dry Trimming
The curing process breaks down chlorophyll remaining in the plant, resulting in a less-harsh taste. Remember: harsh buds are not quality buds. These procedures can enhance the shelf-life of a crop, which is highly important with a product like cannabis that isn’t afforded the addition of preservatives.
Wet Trimming
“Wet trimming” involves trimming as soon as plants are ripe. Remove individual branches and proceed to use sharp scissors or shears to precisely trim excess plant matter. As soon as the plants are cut down, the drying process begins. What’s immediately noticeable is how sticky and wet the buds are. While this is an excellent indicator of potential quality, it’s also a breeding ground for contaminants. Buds left in this state will almost certainly be ruined so it is best to act quickly to begin a controlled drying process.
Widely regarded as the preferred method, “wet trimming” offers the most control and quality assurance. It also has the added benefit of allowing you to collect the “sugar leaves” which contain lower cannabinoid levels and can be stored separately to be processed into edibles at a later time. Remember that “High THC; low Cannabinoid level oil” states list from before? This is where that product comes from.
Dry Trimming
This technique is usually reserved for growers with a large amount of plant matter and little time to process it. This involves cutting off branches and hanging them whole from drying lines. Once the plants are dry, they are then trimmed and processed. It is more difficult to achieve the neatness of a wet trim as sugar leaves will curl in toward the buds while drying. The agitation of handling a dried bud during trimming can also result in the loss of potent resin crystals.
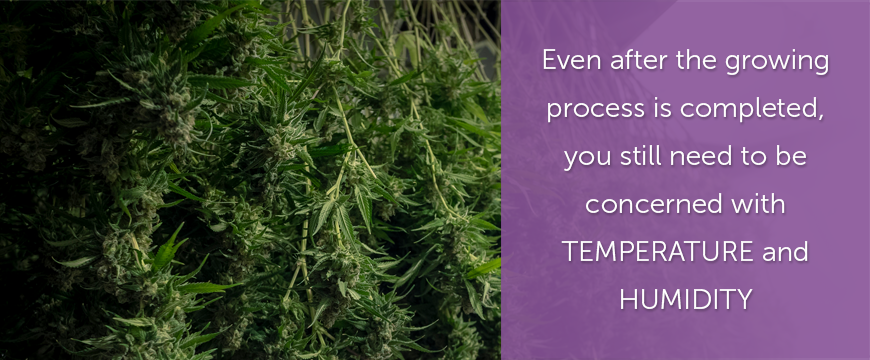
Drying Room Conditions
Whichever method you choose for trimming your product, suitable conditions for your drying room are important. You’ll want a cool, dark environment with temperatures in the range of 59-71°F and humidity at or near 50%. Yes, even after the growing process is completed, you still need to be concerned with temperature and humidity.
The Drying Process
If you opt to use the wet trimming method, you will need to spread them out across a large surface area. Aeration is important so you’ll want to avoid setting the flowers on a surface like cardboard or newspaper as the buds will dry unevenly. Wire mesh or netted drying racks are more beneficial. This allows airflow to reach all sides and lessen the chance of moist air pockets. Make sure to allow yourself enough space to spread your crop out evenly with a small amount of space between buds for the best results.
You may be tempted to speed up the drying process but it has been shown that slow and steady wins the race. Rushing the process and exposing your crop to high temperatures will almost certainly reduce the quality, and result in diminished flavor and even potentially a “poor and uncomfortable high.” Good luck explaining that to your investors or to a discerning dispensary that has numerous growers vying for their shelf space.
Here again is the equipment you can use to help you attain these levels:
- Air conditioner
- Dehumidifier
- Humidifier
- Portable heater
- Thermo hygrometer to measure temperature & humidity levels
Check on your crop frequently, approximately every three to seven days. They will become noticeably drier with each check. You’ll know your buds are properly cured once they can snap easily in your hands without any signs of stringiness. Any bendiness when twisting slightly will tell you there’s water still present and that they’re not ready to move to jars yet.

